Summary: in this tutorial, you will get started with Entity Framework Core and learn how to set up an Entity Framework Core project.
Creating an EF Core project
First, create a new Console App project called HR.
Second, install two NuGet packages:
- Microsoft.EntityFrameworkCore.SqlServer – this package is the Microsoft SQL Server database provider for Entity Framework Core that allows you to work with SQL Server.
- Microsoft.EntityFrameworkCore.Tools – this package contains the necessary tools for working with EF Core such as migration commands.
Defining models
First, create a Department class that represents the departments in the HR system:
namespace HR;

public class Department
{
    public int Id { get; set; }
    public string Name {get; set; }
}
Code language: C# (cs)
Second, create an Employee class that represents the employees in the HR system:
namespace HR;


public class Employee
{
    public int Id { get; set; }
    public required string FirstName {  get; set; }
    public required string LastName {  get; set; }
    public required DateTime JoinedDate { get; set; }
    public required decimal Salary { get; set; }
    public Department? Department {  get; set; }
}
Code language: C# (cs)
The Employee class has five properties including Id, FirstName, LastName, JoinedDate, Salary, and Department. The Department property references the Department class.
Creating DbContext class
First, create a new file called appsettings.json in the project. The appsettings.json will contain a connection string to a local SQL Server database that comes with the Visual Studio by default:
{
"ConnectionStrings": {
"Local": "Data Source=(localdb)\\MSSQLLocalDB; Initial Catalog=HR"
}
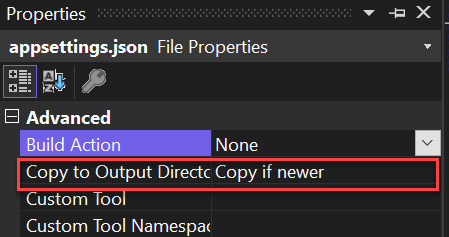
}Code language: plaintext (plaintext)Second, set the Copy to Output of the appsettings.json file to Copy if newer so that Visual Studio will copy the appsettings.json to the output directory whenever you change the settings.
Third, create an HRContext class that extends the DbContext class:
using Microsoft.EntityFrameworkCore;
using Microsoft.Extensions.Configuration;

namespace HR;

public class HRContext: DbContext
{
    public DbSet<Employee> Employees { get; set;}
    public DbSet<Department> Departments{  get; set; }

    protected override void OnConfiguring(DbContextOptionsBuilder optionsBuilder)
    {

        var configuration = new ConfigurationBuilder()
            .SetBasePath(Directory.GetCurrentDirectory())
            .AddJsonFile("appsettings.json")
            .Build();

        var connectionString = configuration.GetConnectionString("Local");

        optionsBuilder.UseSqlServer(connectionString);
    }
}Code language: C# (cs)
In the HRContext class:
- Define two
DbSetincludingEmployeesandDepartments. - Overriding the
OnConfiguring()method of theDbContextclass. Inside the method, get the connection string and pass it to theUseSqlServer()method of theDbContextOptionsBuilderobject.
Creating a migration & synchronize it with the database
First, open the Package Manager Console (PMC) and use the Add-Migration command to create a new migration:
Add-Migration InitialCode language: plaintext (plaintext)It’ll output the following:
Build started...
Build succeeded.
To undo this action, use Remove-Migration.Code language: plaintext (plaintext)
If you look at the project, you’ll see a new directory called Migrations, which contains two files:
20230608032229_Initial.cs– contains the Up() and Down() method. The Up() method creates the Employees and Departments while the Down() method drop them. The filename begins with a timestamp, followed by an underscore (_) and the migration name.HRContextModelSnapshot.cs– represents the current state of the database model. EF Core uses the information on this file to generate the appropriate SQL statements for updating the database schema.
Second, run the Update-Database command in the PMC to apply the migration to the database:
Update-DatabaseOutput:
Build started...
Build succeeded.
Applying migration '20230608032229_Initial'.
Done.Code language: plaintext (plaintext)
The Update-Database command creates a new database if it has not been created and applies the changes specified in the 20230608032229_Initial.cs migration to the database.
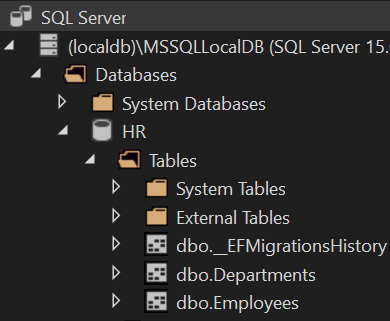
In this example, it creates three tables:
__EFMigrationsHistory– stores migration history.Departments– maps to theDepartmentmodel class.Employees– maps to theEmployeemodel class.
When you display the local SQL Server database, you’ll see the new database and tables created:
Adding data to the Departments table
To add one or more rows to the Departments table, you create new Department objects, add them to Departments DbSet of the HRContext class, and call the SaveChanges() method.
Modify the Program.cs program to insert three rows into the Departments table by using the following code:
using HR;
InsertDepartments();
static void InsertDepartments()
{
var departments = new List<Department>()
{
new Department {Name="Sales" },
new Department {Name="Marketing" },
new Department {Name="Logistics"},
};
using var context = new HRContext();
foreach (var department in departments)
{
context.Departments.Add(department);
}
context.SaveChanges();
}
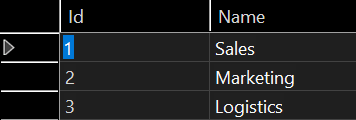
Code language: C# (cs)If you run the program and view the data of the Departments table, you’ll see that EF Core inserted three rows into the Departments table:
Querying data from the Departments table
The following program gets all data from the Departments table and displays the Id and Name of each department in the Console:
using HR;

SelectDepartments();


static void SelectDepartments()
{
    using var context = new HRContext();
    var departments = context.Departments.ToList();

    foreach (var department in departments)
    {
        Console.WriteLine($"{department.Id} - {department.Name}");
    }
}Code language: C# (cs)
Output:
1 - Sales
2 - Marketing
3 - LogisticsCode language: plaintext (plaintext)
How it works.
First, create a new HRContext object to connect to the database.
Second, call the ToList() method of the Department DbSet and assign the result to the departments variable.
Third, iterate over the departments and display their Id and Name to the console.
Installing the EF Core Power Tools
The EF Core Power Tools is a powerful tool that helps you save time when working with Entity Framework Core. We’ll use the EF Core power tools to view entity data in this tutorial.
Here are the steps for installing EF Core Power Tools:
- First, select Extensions > Manage Extensions in Visual Studio.
- Second, search for the EF Core Power Tools in the search box.
- Third, click the Download button to download and install it.
To view the entity data in the HR project, you can right-click the HR project, and select the EF Core Power Tools > Add DbContext Diagram.
Visual Studio will rebuild the project and display a diagram as follows:

The diagram illustrates the entities Employee and Department and their relationship. It also shows the properties of each entity in detail.
Summary
- Install Microsoft.EntityFrameworkCore.SqlServer and Microsoft.EntityFrameworkCore.Tools to EF Core project and use EF Core Power Tool to make it easier to work with Entity Framework Core.